Wednesday 13 November 2013

Delish Baby Banana Choco Muffins

As promised!!! Taaaaaa.....daaaaaa......Baby banana chocolate muffins! They are out of this world the banana-ist muffins! Simple ingredients and steps! Let's get started!

I usually keep plenty of bananas at home just in case I get hungry, I can always turn to something healthy yet low in calorie, that's why at times when they become really ripe and will turn bad in just one day or two, it's time to cook something with bananas!!!!!They are natural sweetener and they never failed to bring my banana-involved recipes to a new level, not even once. Without further adieu, here are the ingredients you will need. 


Ingredients:

1. 3 ripe and mashed bananas (super ripe bananas with spots on them, heard that you can speed up the progress of ripening the bananas by putting them in the oven for 5 minutes? Haven't tried that but that makes sense to me, will try it and tell you guys whether it works or not)

2. 1&2/3 cup of cake flour (you can use all purpose flour but cake flour is more fine and it's less dense)

3. 1 cup of chocolate chips (i used milk chocolate)

4. 1 tsp of baking powder

5. 1/2 tsp of baking soda

6. 1/2 vegetable oil

7. 1/4 tsp of vanilla extract (try to use the pure one not the artificial one, it tastes better)

8. 2 eggs at room temperature

9. 1/2 cup of organic cane sugar

10. 1/4 salt

11. 1/4 cinnamon

Steps:

1. Preheat the oven to 180 degree Celsius and line your muffin tin 
2. Mix two tbsp of flour with the chocolate, make sure all chocolates are coated with flour then set aside
3. Lightly beat the eggs 
4. Add in all the wet ingredients (oil, mashed banana, vanilla extract), at this point, you may find the mixture gluey and ooey but it's absolutely fine and I guarantee you it is gonna be just fine!
5. Mix the dry ingredients well (the flour, the baking powder and soda, cinnamon, sugar and salt)
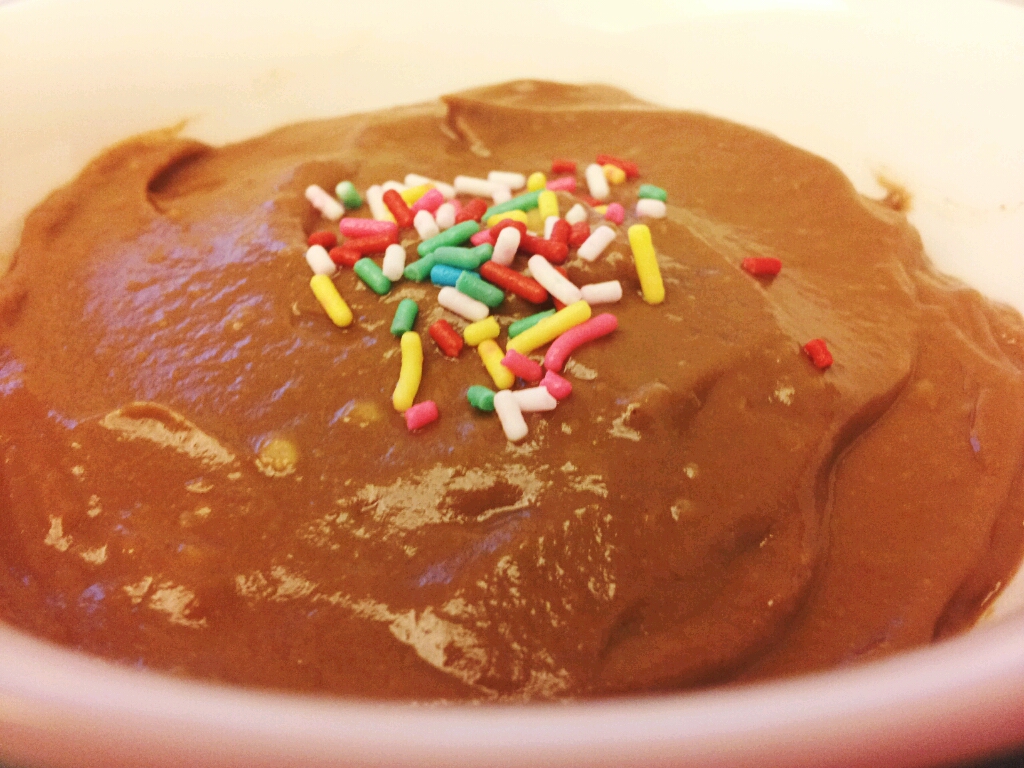
6. Mix the dry ingredients with the wet ingredients and then add in the chocolate chips and fold the chocolates in well
7. Use a spoon and scoop the mixture evenly into the muffin cups and bake for about 14-16 minutes (the best way to check whether it is ready is to insert a toothpick in it and when it comes out clean, you know it's ready *winked*)

Here you go, the divine and relish baby banana chocolate muffins!! Nom Nom!!!!
credits to Laura's kitchen :)))))

Enjoy :)

Ada
xoxo

Tuesday 12 November 2013

Healthy Crab Cake Recipe

Hello people!

Weather in Hong Kong is finally getting colder and we've came up with this yummy crab cake recipe which serves an ideal side dish for your salad this fall!


Ingredients (Serve 1)
  • 1 can of white crab meat (I got it from Marks & Spencer)
  • 1 egg
  • 1/2 lemon juice
  • 1/2 cup of bread  crumbs
  • 1 tbsp. of mayo
  • 1 tsp. of Dijon mustard
  • 1 tsp. of salt
Directions
 
1. Mix all the ingredients together apart from the bread crumbs and the crab meat. 
2. Put in the bread crumbs and crab meat to the mixture.  Mix them well. Make sure you don't over mix it.  The bread crumbs should remain crunchy.
3. Form the patties with the help of a spoon.  Put them on a plate.
4. Heat the stove with 2-3 tbsp. of olive oil in medium heat.
5.  Cook the patties for approximately 2-3 minutes on each side.
 
Enjoy :)
 
Natalie


Thursday 3 October 2013

The Mon Style Cheese Omelette

Here I present a Carb free, healthy and filling snack to you guys!!!! The Mon style Cheese Omelette!!

So what is the Mon style? There is a really famous and good Japanese restaurant in Hong Kong called the Mon and it certainly gained its reputation by its divine dish--Cheese Omelette. It's sweet, soft and cheesy!!!!! I decided to make it myself and it is surprisingly good, it can be softer though (guess I may add a bit of water in it next time and i will post a picture of that again!)

Anyways, there are basically just three things you will need for this dish and they are:

Ingredients:
1. 1 whole egg and 2 egg whites
2. one packet of stevia/sweetener of choice
3. a slice or two low-fat cheese (personally prefer the Kraft ones as they are cheap and easy to purchase, you can find it in any supermarket!)

Those are all you need to make a yummy the Mon style Cheese omelette, you probably already have these in your fridge, why don't you get started now? Well, I have to say that there are some special utensils you will need in making this and they are

Utensils:
1. Best if you have a small and rectangular saucepan which will shape the omelette nicely, I bought mine from Taste, I will post picture of that later
2. a pair of chopsticks
3. some tissue to wipe away any excess coconut oil

Steps:
1. Whisk the eggs well
2. Add a tsp of water into the stevia and add the mixture to the egg and stir well
3. Pour a thin layer of egg mixture in the saucepan and wait until it's cooked (you know it's ready when it moves like it can be flipped when you move the saucepan back and forth)
4. Fold the omelette with the aid of the chopsticks
5. Fold it until it becomes a rectangular roll and push it to the top of the saucepan then wipe the lower part of the saucepan with the tissue which soaked in coconut oil
6. Pour another thin layer of egg mixture and repeat the above steps until all egg mixture is used
7. When doing the last layer and when it's almost cooked, put the slice of cheese on it then roll the egg to wrap the cheese inside

The cheese will then melt inside this yummy omelette and it's ready to serve!!!!!

Calories content:
192 kcal!!!!!!! Less than 200! OMG, nothing can be better than that, seriously!

Enjoy <3

Ada
xoxo

Sunday 29 September 2013

Clean Eating Recipe #5- Chicken Piccata

Hey guys! Sorry for the lack of updates, school has been so hectic for me that I hardly have any time to prepare any recipes for you all. But I've managed to squeeze in a little bit of time this weekend to try this simple and easy Chicken Piccata Recipe.  Trust me, it would be done and ready in no time (15 minutes max). Without further ado, here goes the recipe...


Ingredients (Serves 1)
  • 4 chicken fillets
  • 4 slices of lemon
  • 1/4 cup of lemon juice
  • 1/4 cup of white wine
  • Salt and pepper to taste
  • 2 tbsp. of olive oil
  • 2 tsp. of capers
Directions
1. Spread a handful of salt and pepper on one side of each chicken fillet.

2. Heat the pan with medium to high heat with olive oil.  Once it gets hot, put the chicken fillets onto the pan, seasoned side down.

3. Spread a handful of salt and pepper on the unseasoned chicken fillets.

4. Once the chicken fillets turn golden brown, flip them over and cook until golden brown (approximately 2-3 minutes for each side).

5. Pour the lemon juice, white wine and capers into the pan.  Put a slice of lemon onto each fillet.

6. Turn the stove to low heat, cover the pan with lid and let it simmer for 2-3 more minutes.

Ta-da!  So simple and easy right?  Let us know what other chicken recipes are your favourites!

Natalie :)

Wednesday 11 September 2013

Choco Mint Ice Cream For Your Sweet Tooth

Still remember the banana ice cream covered with strawberry jam we had last time? The following recipe is just another version of it--the choco mint ice cream, suitable for all choco lovers :)!!! Simple, clean, refreshing and sweet! What are you waiting for? Here are the ingredients:

Ingredients:
1. 1 frozen banana
2. some mint leaves
3. some semi-sweet chocolate
4. a bit of spinach--just one to two leaves will do (to add the green-ness)

Steps:
1. Blend the mint leaves, spinach and frozen banana until it is ice cream consistency
2. add in the semi-chocolate

Only two simple steps could you make yourself a fulfilling and refreshing ice cream!

Oh btw..I went to have all-you-can-eat last time at Mr. Steak and there was a counter where they had all sorts of haagen-daz ice cream, well then of course i went ahead with the banana flavour. After the first spoon, you should see that satisfactory smile on my face! I swear I could make better banana ice cream than that!!!!!!!! Of course!!!! I am using pure frozen bananas to make my banana ice cream, what could be better?????? ENJOY! 


See you guys and I shall come back with simpler and yummier recipes!!!!! Can't wait!!!

Love you guyz

Ada
xoxo

Sunday 8 September 2013

Simple Packed Lunch Idea - Quinoa with Chicken, Cherry Tomatoes, and Pesto

I'm still trying to maintain a balance between the busy school schedule and a healthy diet.  Since school has started a week ago, I realized that eating out may not be a good option if I want to maintain the healthy lifestyle I had during the summer (I tried to do as much home cooking as possible so I can control the ingredients of my meals and cutting out any sort of sugary food and any kind of salt as much as possible, although I still allowed myself 1-2 cheat meal(s) per week.). So whenever I have time, most likely after a workout at night or on weekends, I will try to squeeze in between the time to prepare lunch for the next day.  So here's a delicious and healthy packed lunch recipe that won't leave your stomach feeling empty for your busy daily schedule!


Ingredients (Serve 1)
  • 100 ml of quinoa
  • 6 cherry tomatoes (add more for your liking)
  • 2 chicken fillets
  • 1 glove of garlic
  • A handful of sundried tomatoes
  • 1- 1.5 tbsp. of pesto sauce
  • A handful of basil leaves

Directions

1. Cook the quinoa according to the instructions and set aside.  (For directions on how to cook quinoa, click here.)

2. Chop the garlic and dice the cherry tomatoes and chicken fillets.

3. Turn the stove to medium heat and heat the saucepan with olive oil.  Once heated, throw in the garlic until they turn golden brown.  Put in the diced chicken, tomatoes and sundried tomatoes.  Stir-fry everything together until they are cooked.

4.  Turn the stove to low heat and put in the cooked quinoa.  Stir in the pesto sauce and stir-fry for about 1-2 minutes. Once everything is cooked, put a few basil leaves on top for décor or to taste.

5.  It can be served immediately or just put in the fridge as your packed lunch for the next day.

This definitely adds another healthy salad option to your lunch!

Enjoy :)

Natalie

Saturday 7 September 2013

Easy Chicken Bruschetta Recipe

I always intend to go for this chicken bruschetta recipe when I'm starving and not bothered to do any kind of complicated home cooking or  I just want a filling and detoxifying meal. This only takes you in less than 15 minutes to do the cooking.  Besides pairing the sauce with chicken, you can, of course, eat it with any kind of bread that includes baguette, toast, French bread etc..
Without further ado, here goes the recipe!


Ingredients (serve 1)
  • 4 chicken fillets
  • 8-10 cherry tomatoes
  • 1/4 red onion
  • A handful of basil leaves
  • 1/4 cup of feta cheese
  • 1 glove of garlic
  • 1 tbsp. of extra virgin olive oil
  • 1 tbsp. of balsamic vinegar

Directions
1. Heat the stove in medium heat with some olive oil.  Cook the chicken fillets until they are fully cooked.  Set them aside.

2. Dice the cherry tomatoes, red onion, basil leaves and garlic.  Throw everything together in a bowl and mix them together with the feta cheese, olive oil and balsamic vinegar.

3. Serve the chicken with the sauce.

What more can I say?  This is the SIMPLIEST recipe ever that is going to treat your taste buds!

Natalie :)

Wednesday 4 September 2013

Easy No-Cook Rice Paper Rolls

Sometimes a salad just won't cut it for me, but a full carb-heavy meal isn't right either. Today was one of those days, and I was craving a light, fresh but satisfying dinner.
I scrummaged around and found a pack of rice paper sheets that I decided would be the perfect base to my light summery meal.

These are amazingly versatile and taste so fresh you feel like you're eating rainbows!

The magic of these rice paper rolls is that they are easy and convenient because when it comes to the filling -practically anything goes. The traditional vietnamese rice paper rolls are known to have a shrimp-based filling and some vegetables as well. However, I didn't have any shrimp so I had to make do with something else.

All the ingredients you need. Plus the rice paper, of course :P

As long as you balance out the textures within your roll, anything should be fine. I cut up a red pepper, some cucumber and a small portion of smoked tofu (in place of seafood or meat). In case I wasn't satisfied by that, I softened up a packet of vermicelli as well to give the meal a bit more carbohydrate. For the sauce, I initially wanted to use this raspberry-blackberry-basil vinaigrette, but it proved to be a bit too dessert-like. So I dug out some natural peanut butter and improvised a peanut butter sauce for the dish.


The final product! The peanut sauce went much better with the rolls :)
To make the peanut butter sauce:

Mix together:
1 spoon of peanut butter
Several drops of pure toasted sesame oil
A splash of soya sauce
Several drops of fish sauce


The verdict?

Perhaps you'll be as surprised as I was to hear that 3 rolls were actually more than sufficient to fill me up and satisfy my carb cravings. I ended up having four because there were leftover rolls, but in reality could've happily stopped at three. So the verdict is that they are a good all-rounded, low calorie meal that could be easily adaptable to different tastes/allergies/etc. What are you waiting for? Get rolling!

What are your filling recommendations?

Nikki


Saturday 31 August 2013

Weekend Meal - Rosemary Lamb Chop and Quinoa

I have been clean-eating for quite awhile and I feel that from time to time, you just got to treat yourself, give yourself 1-2 cheat meals once a week.  Having tried my first yoga class today, followed by an hour cardio exercise, I think I deserve something nice tonight.  So I decided to make rosemary lamb chops sided with quinoa for dinner.

Lamb Chop is definitely one of my favourite foods apart from beef (I try to have less red meat now that I have started clean-eating.) For those who doesn't eat lamb, don't worry, the quinoa recipe below is a must-try, it tastes so good and it is so easy to make.  It would be a great lunch too.  Trust me, you will fall in love with it just like I do! Plus, quinoa has so many health benefits.  It contains complete proteins and it is filling that won't make you bloat.  It's such a great alternative to rice.


Ingredients (Serve 2)

For the lamb chops

  • 6 lamb chops
  • 1/2 cup of olive oil
  • Salt and pepper to season
  • 1/4 cup of fresh rosemary
For the marinade of lamb chops

  • 1/2 tbsp. of butter
  • 1/4 cup of white wine
  • 1/4 cup of chicken broth
For the quinoa

  • 1 cup of quinoa
  • Salt and Pepper to season
  • 2 tbsp. of olive oil
  • 1/4 cup of fresh mint leaves
  • 1/4 cup of fresh parsley
  • 1/4 cup of sundried tomatoes
  • 1/4 cup of feta cheese

Steps


1. Marinate the lamb chops with olive oil, fresh rosemary, salt and pepper.  Leave the marinade on the lamb chops in the fridge for at least 1.5 hours or more.


2. Heat the non-sticky pan with olive oil.  Once it is hot enough, cook the lamb chops with the pan.  Cook each side for 3 minutes if you want them medium rare. 


3. When the lamb chops are done, put them aside on thick paper towels to absorb the excess oil.  On the non-sticky pan, add in the butter, white wine and chicken broth to the remaining marinade. Let the mixture sizzle for 3 minutes or so or it thickens a bit. This would serve the sauce for the lamb chops.


4. While you're cooking the lamb chops, you could cook the quinoa at the same time.  To cook 1 cup of quinoa, you would need 2 cups of water.  Cook the mixture together with a handful of salt to taste and some olive oil to make the quinoa more fluffy.  Once it boils, turn to the lowest heat and let it simmer for 15 minutes with the lid on. Then turn off the heat and let it sit for 5 more minutes.


5. Mix the cooked quinoa with salt and pepper, olive oil, fresh mint leaves, fresh parsley, sundried tomatoes and feta cheese.


6. Serve the lamb chops with the sauce and sided with quinoa.

Hope everyone is having a good weekend!

Natalie :)


Easy DIY Kimchi Fried Rice - A Delicious Detox Superfood

I don't know about you, but I freakin' love Korean food.


Tofu House (Kimchi Fried Rice, Stone Bowl)
Kimchi Fried Rice - Photo by Jaryl Cabuco of The Fitted Life

How often have you gone to a Korean restaurant, ordered kimchi stone pot rice, and finished your meal just wanting more? 

If you ask me, the answer is: all the freakin' time.

So, being tired of having to go to the restaurants to get my (overpriced) fix, I decided to make my own. While I searched for an easy DIY recipe for kimchi, I found out that kimchi is actually really good for you, owing to its fermented nature. It especially helps to promote the growth of beneficial intestinal bacteria like lactobacilli, which are important for digestion and can help to prevent problems like yeast and urine infections, inflammation processes like acne and eczema, and many more

So naturally, I thought - healthy and tasty? Bring it on!

I used this easy recipe from a Youtuber to make the kimchi. The result:

Hallelujah.

This recipe from well-known Korean food blogger Maangchi is also a great one - but I found the youtube video above easier to follow. I did adapt my recipe and used Maangchi's tip of adding rice flour to the kimchi juice to thicken it, and it does seem to help ferment the kimchi better as the juice would be more well distributed within the jar rather than sinking to the bottom. I also fermented it using Maangchi's method of storing the kimchi in a dark place at room temperature for 1-2 days before storing it in the fridge.

The kimchi can usually keep for a long time - they say up to 2 months, but I usually eat it within 2 weeks anyway. Often fried with rice and a runny fried egg on top - YUUUUUM :)

fried egg on kimchi fried rice

runny eggs are the only way to go ;)
Kimchi pancakes are a great way to have kimchi too! I like my pancakes fluffy and thick rather than in the crepes that you can get in restaurants...I like to think the flour absorbs some of the spice - it sure helps!

Do you like kimchi? How do you eat it?

Nikki


Thursday 29 August 2013

Low Fat Carbonara Recipe

My biggest weakness in this whole clean-eating diet would have been pasta, if you ask me.  Seriously, if it does not contain as much carbohydrates, I swear I am able to eat pasta every single day.  To satisfy my pasta cravings, here is a slightly low fat Carbonara recipe adapted from Laura in the Kitchen.


Ingredients (Serve 1)
  • 1 slice of bacon chopped into pieces
  • 1/4 onion
  • 1-2 oz. of whole wheat spaghetti
  • 1 egg
  • 1/2 - 1 tbsp. of heavy cream (depends how much taste you want)
  • 1 handful of grated Parmesan Cheese
 
Directions
 
1. Mix the beaten egg, heavy cream and Parmesan Cheese.  Set the mixture aside.
 
2. Chop the onion and bacon into pieces.
 
3.  Boil the water.  Once it is boiled, cook the spaghetti for around 10 minutes.
 
4. While you are cooking the spaghetti, heat the non-sticky pan with olive oil.  Once it is heated, cook the bacon until it is crispy.  Add in the onion.  Cook for 2 more minutes. 
 
5.  When the spaghetti is cooked, put the spaghetti and mix it with the bacon and onion in the pan.   Stir-fry for around 1 minute.  Turn off the heat.
 
6.  Drop the egg mixture onto the pan of spaghetti and mix well until every spaghetti is covered with the sauce.
 
Enjoy! 
 
Natalie :) 

Wednesday 28 August 2013

Luxuriously Tasty High Tea At Home, Shall We?

Cookies! I LOVEEEE cookies regardless they are the crunchy ones like those you have at..say for example Pret or soft like those you have at Mrs Fields, I just love cookies! I am so glad that I found this recipe and I can tell you that this recipe is the easiest recipe you can ever find!! I swear!

This recipe requires around 10 minutes in preparing? 15 minutes for baking and you only need 2 ingredients! What could be easier? Without further ado, let's get started!

Ingredients you will need: (for one serving)

Cookies 
1. 1 ripe banana
2. 1 cup of rolled oats
3. 1/4 cup of semi-sweet chocolate (optional...I have a sweet tooth so I even added half a cup of it)

The sauce
1. 2 strawberries
2. 1 tbsp of greek yogurt
3. 1 tsp of maple syrup

Directions:

Cookies
1. Pre-heat the oven at 250 degrees 
2. Peel the banana and put it together with the rolled oats in a relatively large bowl
3. (The best part of all) Rub the oats in the banana with your fingerrrrrrrssss! Feel the squishiness...feel the rawness of food!!!!!!!! (Make sure your hands and fingernails are clean before you do this)
4. Add in the chocolate and mix it well with the batter
5. Brush a thin layer of oil over the baking tray before you put your dough on it
6. Spoon out the cookies of the size you want from the dough and put it on the baking tray (For me, I usually make them smaller, about biting size so that I could have moreeeee and I feel like i could eat moreeee)
7. Brush another thin layer of either egg white or oil on top of the cookies then it's all ready to bake
8. Bake it for 15-20 minutes and take it out, let it rest for about 5 minutes
Cookie dip strawberry sauce

Direction:
1. Mix everything in a blender and it's ready to go with the cookies
It's simple as that! What are you waiting for? Try it now!
Love you guys, enjoy!
Ada
xxxx


Tuesday 27 August 2013

WAKE ME UP! - Low Calorie DIY Vanilla Spiced Latte Recipe

Hey there sleepyheads!

Quick post today - I thought I'd share my much anticipated DIY vanilla spiced latte recipe which was inspired by the Starbucks Vanilla Chai latte that came out a few months ago in the UK. This recipe is much healthier and packs much fewer calories than the Starbucks version. If super-sweet coffee is your vice, I'm afraid this recipe might not be for you. But if you're like me and just wish you could have a coffee that tasted like coffee and a little something extra, then this recipe is PERFECT for you!

What you need:

Keeps me awake for the rest of my (often 12-13 hour) work day!

  • Boiling water
  • 1 sachet/tbsp of instant coffee
  • Soy/almond/hazelnut milk. I use unsweetened to lower the calories even more, but sweetened milk does give it the perfect taste.
  • 1/8 tsp of ground cinnamon
  • Pinch of ground nutmeg
  • Several drops of vanilla extract (optional)
  • Pinch of cayenne pepper (optional - adds a kick!)
Directions:
  1. Place all your dry ingredients and vanilla extract into the mug.
  2. Pour boiling water to help mix everything, until the mug is 3/4 full. 
  3. Add milk to taste, or until the cup is full.
  4. Stir, and enjoy! 

I know what you're thinking - cinnamon and cayenne pepper?! As you may see in some of my past as well as future recipes, I try to use cayenne pepper as much as I can. Cayenne pepper has a huge number of purported health benefits and, along with cinnamon, has been reported to be help the body's immune system - including helping to fight inflammation and also promote weight loss by decreasing appetite. Of course, in one mug of coffee, the amount of spice we've used probably won't make much of a difference. But if you consider it in terms of the accumulative amount you might take in over a month - the benefits might be more likely to show ;) Plus, using spices in place of sugar to help improve taste is always a great way to lower calorie intake! 

Breakfast time - Veggies and steamed egg, check! Vanilla spiced latte, check!

I usually have my morning coffee with my go-to detox breakfast that keeps me full until lunchtime and stops my cravings for junk food and sugar. Look out for the recipe coming up soon!

Do you have any favourite coffee shop flavours that you'd like us to turn into a low-calorie, healthy version? Let us know in the comments and we'll figure out a recipe for you!

Nikki :)

Monday 26 August 2013

Healthy Creamy Avocado Sauce

Hands down this is one of the healthiest and yummiest creamy sauce I've ever had (without the actual cream, hence, less calories!)!! And what's more is that it has so much health benefits with a lot of fiber!  I love this sauce so much that I could really eat this everyday with a variety of combinations such as whole wheat pasta, toast, or just...simply eat it alone :D


Look at the smooth texture...*drooling already*

Love the sauce on whole wheat bread with bacon and a slice of cheddar cheese.  You can also heat the sandwich with the pan and melt the cheese.  This combination is just.....divine omg!!

I've always been craving this creamy avocado pasta...topped with Parmesan cheese of course.  Just can't live without cheeeeseeee. :)


Ingredients
  • 1 avocado
  • 2-3 tbsp. of lemon juice
  • 1 tbsp. of extra virgin olive oil
  • 1 glove of garlic
  • Salt and pepper to taste
Directions
1. Slice the avocado into tiny pieces. 
2. Dice the glove of garlic.
3. Blend all the ingredients together in the food processor.

There you have it, HEALTHY, DELICIOUS, CREAMY AVOCADO.  SO RAW AND SO EASY.

Natalie

Clean Eating Recipe #4 - Simple Greek Quinoa Salad

I know it is very difficult to struggle with your healthy diet when you are busy working or studying.  But don't worry, here is a super simple and absolutely delicious recipe for you - Greek Quinoa Salad.  All you need are just a handful of ingredients when you can easily find them in the supermarket!  You could always make it the night beforehand, put it in your fridge and take it when you go out for work/school the next day!

Feta cheese just makes everything better!


Ingredients (Serve 2)

For the quinoa
  • 1 cup of quinoa
  • Salt and pepper to season
  • 1 tbsp. of olive oil
For the salad
  • 1/2 of red pepper
  • 1/2 green pepper
  • 1/2 of yellow pepper
  • 4 chicken fillets/chicken breasts
  • 1/4 cup of feta cheese
  • 1/4 cup of sundried tomatoes
For the dressing
  • 1 tsbp. of olive oil
  • 3 tbsp. of balsamic vinegar
  • 2 tbsp. of Dijon mustard
Directions

1. Marinate the chicken fillets/chicken breasts with salt.  Put them into the boiling water until they are fully cooked.  Cut them into small pieces.  Set them aside.

2. Chop the red pepper, green pepper and yellow pepper into cubes.  Set them aside.

3. Heat up the saucepan with medium heat.  Fry all the peppers together with the cooked chicken. Put them aside.

4.  Wash the quinoa with tap water to remove its taste of bitterness. 

5. To cook 1 cup of quinoa, you would need 2 cups of water.  Cook the mixture together with a handful of salt to taste and some olive oil to make the quinoa more fluffy.  Once it boils, turn to the lowest heat and let it simmer for 15 minutes with the lid on. Then turn off the heat and let it sit for 5 more minutes.

6.  Mix the olive oil, balsamic vinegar and Dijon mustard together.  That would serve as the salad dressing.

7.  Mix the quinoa, peppers, chicken, feta cheese, sundried tomatoes with the salad dressing.

There you have it, a simple and delicious meal!! :)

Let us know what is your favourite way to cook quinoa!

Natalie
xxx

Sunday 25 August 2013

"Pasta" In Mushroom Cream Sauce

Feeling hungry and don't know what to have for lunch or even dinner? It's always a pain in the neck because for me, as mentioned in the "about" on fb, I am a relatively petite girl but with an extraordinarily huge appetite (all-you-can-eat or buffets used to be my favourites...well they still are...but I only allow myself to have those insane cheatmeals on reallly special occasions), so I usually make sure I have eaten enough for every single meal (around 80% full...well sometimes or most of the times 99% which is not good...The key to eat less but feel more fulfilling is definitely to eat your food slowly, try to enjoy every bit of it and make sure you don't starve yourself too much before you have your meal!)

Yesterday, when I was starving and my stomach growling, it's a sign to have a big meal. I need carb, I need energy and I need something tasty, what could I possibly make myself for lunch that satisfied all my greedy desires yet low in calorie? There you go....here I present to you--*drumsticks again* the divine Pasta in mushroom cream sauce! It's soooo good that I don't mind having this for lunch or dinner every day until I get sick of it! 

Anyways, here are the ingredients you will need

Pasta:
1. The konnyaku (made of japanese yoshino yam)..The texture of it is a bit rubbery and it tastes bland but well it absorbs the favour of the sauce you put in, you can easily get this from any international supermarkets in the japanese corner
They have both white and brown konnyaku for options, I usually go for brown but white will work equally well
Mind you...it's super low in calorie (12 kcal per pack)
2. One big Portobello

Sauce:
1. One avocado
2. 2 tbsp of almond milk (you can use whatever milk you want, cow milk, coconut milk)


Directions:
For Sauce
1. Spoon out the avocado and take out the seed from it
2. Blend the avocado with the 2 tbsp of almond milk


For the pasta
1. After you take the konnyaku out, rinse it with tap water then put it aside (it's originally soaked in salt water so as to preserve the taste) 
2. Wash the portobello until the black comes out a bit and try to squeeze the water out from the portobello
3. Cut the portobello in pieces and fry it with coconut oil or any oil you have in hand
4. Add a pinch of salt in the portobello and keep frying it until it all dries up (The salt won't melt completely as there's no water in the saucepan but it's totally fine just make sure you only add tiny pinch of salt in it)
5. Add in the pasta and mix it well with the portobello
6. Add the sauce in the pasta and fry it for another 1 minute
7. Garnish your dish with a bit of rosemary leaves or basil and some black pepper as well! Then it's ready to serve


Isn't that simple? I was so surprised that it tastes soooo good that it actually stops me from craving for carbonara or other unhealthy pasta outside. Try it yourself and share with us!

Enjoy <3

Ada
xoxo


Friday 23 August 2013

Super Duper Delicious Dessert --Banana Ice Cream

Hey guys! I have come back with a super duper delicious and easy dessert recipe--Banana ice cream! I have to say that I am a die hard fan of dessert, whether it be a cheat meal or a healthy meal. I am always tempted to have dessert so as to make my day....you know...just more complete.  Unfortunately, you have no idea how many cups of sugar a simple tiramisu or a cheesecake actually contain and the fat content...well let's just say I wouldn't want to scare you with the figures. Anyway, still remember this post about the benefits of eating bananas? The following recipe only requires two very simple ingredients (or three depending on what sauce you want to make yourself). You wouldn't think something so wholesome and natural could be so amazing and better yet - it only takes you 3 or even 2 minutes to make it!!!

Recipe from Danispies

Ingredients you will need: (Simple as that!)

Ice Cream
1. Bananas (Half a frozen banana)
2. Almond Milk (3 tbsp)

Sauce
1. Two strawberries


Directions:
1. Cut the bananas in half and put them on a plate (remember to separate them, make sure they don't stick together)
2. Put them in the freezer for seven hours. 
3. When the bananas are frozen, they are good to go
4. For one serving, half of the frozen banana will be enough, put it in a blender together with 3 tbsp of almond milk
5. Blend it until the frozen banana became ice cream like texture
6. Then it is time to make the sauce, blend the two strawberries until it is purely juice
7. Pour the sauce on top of the ice cream and it is ready to serve! Enjoy <3

Seriously, this ice cream is truly comparable with those you can eat outside and mind you... this it is absolutely clean, healthy and TASTY! What more can you expect? All you need is just 2 minutes!!!! This cup of rich, luxurious, creamy ice cream is all yours now (we shall all be happily singing the banana song featured by the minions while eating this WOHOOO!) Vary the recipe in whatever way you want, make your own recipe and share it!

Enjoy!

Ada
xoxo


Thursday 22 August 2013

Clean Eating Recipe #3 - Skinny Honey Lemon Bars

I'd always love using lemon as one of the ingredients when cooking/baking.  It's particularly refreshing which increases your appetite in this hot summer days. So I just have to share this recipe with you guys.  It is so healthy and very yummy, definitely worth the time in making this! Plus, it would be the perfect snack for your tea time.  You can always make it the night before, grab a bar of two of it the next morning when you go out for school or work.

Who says you can't eat dessert when you're eating clean?  With only 172 calories per bar, this is the perfect for those who is craving for something sweet and tasty!

Recipe from skinnytaste.com
 
Spread the mixture evenly onto the pan when making the crust.
 
 
The crust is looking very crispy already after baking for 20 minutes.  Let it cool for another 20 minutes before adding the filling.


How it looks like after adding in the filling.
 
 
There you have it, SKINNY HONEY LEMON BARS. Nom.

 
Natalie xxx

Wednesday 21 August 2013

Clean Eating Recipe #2: Spinach Konnyaku Noodles on a Bed of Garlic Sauteed Fresh Greens

If you haven't heard of Konnyaku noodles, you're either A) not Asian (although I admit I'm Chinese and I'd never heard of them until they made their way into the health industry haha) or B) not particularly bothered about counting calories (count yourself lucky! :P)

Konnyaku jelly is traditionally used in sweet jellies and in Asian hotpots (I used to think they were seafood - like little octopuses! Lols.) but have been garnishing more and more attention these days as a health food. Because of their similar texture to pasta, it is now promoted as a low-calorie alternative to the traditional carb-heavy ingredient.

Pasta without the calories?! Of course I'm intrigued....but it's taken me quite a while to find the stuff.

At 1.99 pounds (HKD 24) this sure is one pricey dish of homecooked noodles.

Living in the UK, I couldn't find it anywhere in the supermarkets. In the end, I traipsed through the refrigerator aisle at my local chinese supermarket and found it between the tofu and kimchi.


After all the water is drained....this pitiful portion is all that's left :'(

On the front of the packet it says the entire pack is 28 kcal. Being the calorie-stinge that I try to be, I wanted to split the packet in two portions and only consume 14kcal - but alas, once all the water was drained, there was...not much left. So the full pack went into the pan :)


My favorite herbs of all time - fresh basil and thyme

Quarter cup of chopped herbs and my favorite greens - only 1.50 pounds for two packs at Tesco!

One of my favorite tips to eating healthy is to cut down on the salt and MSG/flavorings by using as many herbs (fresh or dried) as you can. My favorites are the above two because of their versatility and nutty flavors which often enhance the chopped roasted almonds that I add to most of my dishes. I'm a bit of a nut ;)

As a sauce, one of my favorite ways to cut down on cream and unnecessary calories as well as enhance the flavour of the dish is to melt a little bit of salted butter into the pan when everything is cooked. A little butter is harmless, adds flavor and moisture to the dish and overall keeps me satisfied with its buttery aroma and taste. 

The finished product:

My mama taught me to love my greens. I think I took it to the next level ;) 


A closer look at that hot green goodness

The verdict on Konnyaku jelly noodles? The truth is, they surprised me. Usually health foods leave me unsatisfied and eating even more - but these were surprisingly filling and satisfying in both taste and texture. However, at 2 pounds/HKD 24 a pack, it's not exactly something I'll be running out to buy as a daily grocery ingredient. (Maybe it's cheaper in HK?)

But other than the price - it really is a great alternative to pasta and if you're interested in trying it out I'd definitely recommend it! As for me, I think it's back to portion control with the carbs until I can afford to eat this stuff on a daily basis ;)

Have you tried Konnyaku jelly noodles?

Nikki


Satisfying Snack Before Dinner

So as promised here is the recipe for the lovely, amazing, incredible yogurt!!!!!!

The ingredients you need is real simple (actually you can have whatever toppings or ingredients you want as long as they are fruits and not in excessive amount)


I like strawberries a lot...well actually I like all kinds of berries but since strawberries is the first thing I saw at the supermarket so I just went ahead with it. I have decided to make my yogurt a beautifully red one so the other fruit I added in is apple! So all you need is *drumsticks*

Ingredient:
1. 1/4 of the apple (in pieces)
2. Two strawberries (chopped them up)
3. Half cup of yogurt (the cup you see in the picture)
4. 1 tsp of granola 
5. A pinch of cinnamon on the top
Calories in this divine snack: 
Apple (12 calories)
Strawberries (15 calories)
Yogurt (50 calories)
Granola (30 calories)
Cinnamon (No calorie but natural seasoning WOW)
Total calorie of this snack is.............107 calories! CAN YOU BELIEVE IT??????? 

Try to make your own yummy delicious yogurt and take a picture and share with us! Won't you?

I will be back for more easy and clean recipes real soooooon!!!!!!

Ada
xoxo

Tuesday 20 August 2013

Important Food Fact #1 -- Banana

Well I used to think bananas are just for monkeys or monkey-like people, I guess I am very wrong (if not completely) about it. You will never look at bananas the same way after knowing all the benefits you could get from eating it, it is a superb natural raw clean food one could easily get! Without further ado, here comes the long awaited list of benefits of bananas!


  1. Bananas help overcome depression due to its high level of tryptophan, which is then converted into serotonin and that acts as the happy-mood brain neurotransmitter
  2. Bananas prevent swelling and it aids weight loss, in other words, it is an essential ingredient to our daily diet
  3. Bananas strengthen the nervous system and it helps with the production of white blood cells, credits to the high level of vitamin B-6
  4. Bananas also act as a prebiotic, it stimulates the growth of friendly bacteria in the bowel and as a result, it assists our digestive system in absorbing nutrients
  5. Bananas are also high in antioxidants so it basically prevents cancer and it improves our skin
  6. Bananas control blood sugar and it helps us avoid binging between meals
  7. Constipated? The high fibre in bananas can help to promote bowel movement and ease constipation!
  8. Bananas are a source of high potassium and are a great healthy option to cure that hangover after a night out! Remember, alcohol can easily dehydrate the body, helping your body to rid itself of useful electrolytes like potassium in the process. Banana milkshake for the morning after? Count me in!


Of course there are so many many other reasons why you should eat bananas and I have only selected the more important and powerful ones which I guess are sufficient to let you know more about the beauty of this ordinary raw clean food.

Last but not least, bananas bring a natural (yet low-calorie) sweetness to the dish so it will take quite an important role in some of our upcoming recipes! Here's a sneak-peek of some in-progress bananas that are about to be featured in some amazing, fantastic and easy recipes real soon!


Ada
xoxo

Guilt-Free Dessert Recipe - Chocolate Avocado Mousse

Having a sudden sweet tooth but hesitate whether to grab a bar of chocolate that is going to ruin your diet plan for the week? 
Don't worry, here is an absolutely healthy, delicious and guilt-free dessert that you will not regret for eating!  It is vegan, gluten-free and most importantly, you cannot taste anything different from other chocolate mousse.  All you need is a handful of ingredients and you can enjoy this guilt-free dessert in less than a minute!

 
Ingredients (Serve 4)
  • 4 ripe avocados
  • 4 tsp. cocoa powder
  • 1/2 cup of skimmed milk / almond milk
  • 3 tsp. of honey (to taste)
  • 1 tsp. of vanilla extract
  • A little bit of salt

Directions

1.  Mix the above ingredients together in the food processor and blend for 1 minute.

2.  Sprinkle with any toppings you want (e.g. strawberries, almonds, nuts etc.)

3. Serve and enjoy!

How easy is this seriously? :)

Natalie

Start Your Day With A Healthy Morning Drink

Every morning (even when I go on trips, I have these ingredients with me, they are small in size and very portable) the first place I head to is my kitchen. Instead of going straight to brushing my teeth or anything else, I make this! This is my everyday morning booster --the honey cinnamon. 

I have to admit that I had a very weak digestive system a year back then due to my severe irregularity of meals. Then I discovered this recipe which aims at adding a protective layer over your digestive system and so well I decided to give it a try. For the first few days, my stomach actually reacted after a few minutes, my stomach was like turning upside down repeatedly but I wouldn't say it was painful, it was just uncomfortable and this lasted for around 10 minutes? If you are experiencing this also, it is absolutely normal and the uncomfortableness will soon disappear. It is a sign that the drink is actually working!!!! Keep it up! Anyways, there are tons of other benefits about this drink which I will go into details later.

Here I present to you the very simple (if not the simplest) recipe you could ever have, the ingredients are all natural, clean and good for your body and skin!

As you can see from the picture below, all you need is:

1. Honey (treat yourself better by buying honey of better quality, I am using White Clover which you can easily find this in any supermarket)

2. Cinnamon (there are many other brands too but I chose this because well it's cheap and it tastes good)


The steps are really simple and here you go :)

1. use honey and cinnamon in a 1:2 ratio (I usually use 1 tablespoon of honey and 1 teaspoon of cinnamon but the amount of honey can be adjusted)
2. put the cinnamon in a cup or bowl first
3. Pour in boiling water to first melt the cinnamon (then you will realise the cinnamon cannot be completely melted and that's normal, try to stir it evenly and it will do)
4. pour water of room temperature over the cinnamon
5. Make sure the drink is warm (at least not hot) then add honey. Always add honey to the cooled liquid – hot liquid will destroy the enzymes in the raw honey.
Remember this drink acts well on an empty stomach <3

And this is the finished product, YUM, I feel like I am one step closer to my healthy lifestyle!!!!


As promised, here are some other benefits of this drink :)
  • It cures colds as it strengthens the immune system and protects the body from bacteria attacks (I haven't had any colds ever since I started making this, I swear!!!! well, guess I have to give credits to my regular practise of hot yoga too!) 
  • It reduces the cholesterol in the arteries, in other words, it prevents heart disease
  • It cures stomachache and it also clears stomach ulcers from THE ROOT
  • Well there is a saying that if you use honey and cinnamon to make a paste and apply it on the pimples, it helps remove pimples from the root (anyone tried it before? Please feel free to share)


I have been drinking this for half a year only and I have to tell you that my stomach didn't go upset as frequently or easily as before (1 to 2 times so far even there were times that I still had irregular meals), this drink is absolutely magical! I just LOVE it! I hope you guys love it too <3

Ada 
xoxo